Quick Start Guild
Whats in the Box
Start by checking you have all the bits that shipped from the original box. These bits include the following:
Looper (the best DNC transfer box on the planet!)
USB Power Supply (5V @ 3Amps)
RS232 to USB Converter
Extension Cable for RS232
You will also need your own (not included) Ethernet cable.
Looper - Box Contents
First Time Power-Up
Your first time powering up Looper will be easier on your desk, next to your computer. This allows you to easily connect and configure Looper. Therefore, just connect the power supply and an Ethernet cable to Looper. Of course, the Ethernet cable will also need to be connected to your building’s network for it to work.
First Time Network Config
After Looper powers up, the box will connect to your building’s network using the Ethernet cable (note: Ethernet cable not included). On the back of the box, you should be able to see some flashing activity lights on the Ethernet connector. This indicates Looper is talking to your network.
Warning
If Looper appears dead, look for the toggle switch on the power supply cable. Each press toggle the power on and off. Note, the LCD will come on as soon as power is applied.
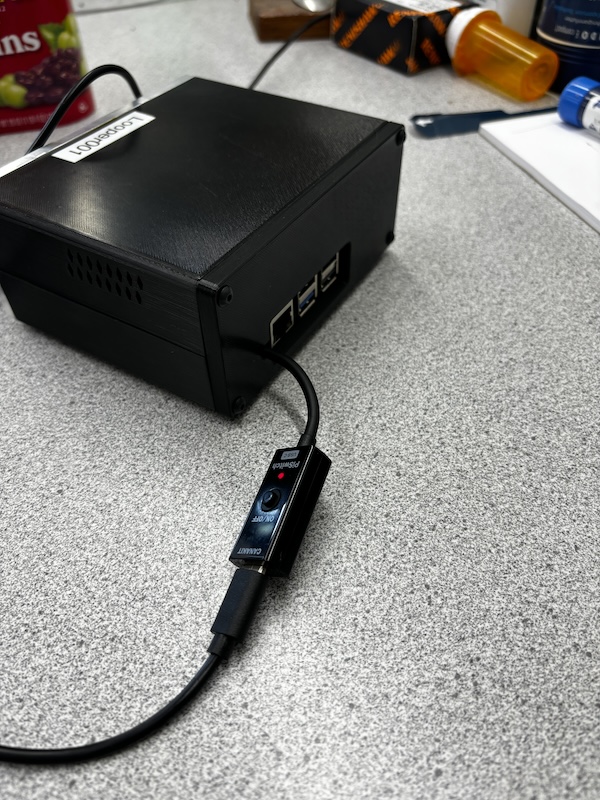
Looper Power Toggle Switch
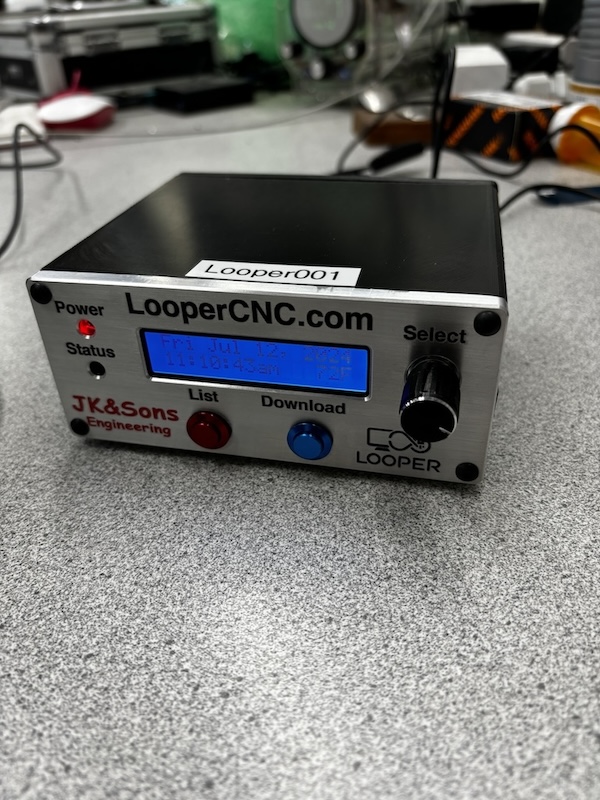
Showing Looper’s IP Number
Every device on your building’s network needs an IP number, and Looper is no different. By default, Looper connects using a dynamic IP number that your router assigns using a protocol called DHCP. This just means the IP number assigned is kind of random. The details are not that important. However, we need to know that IP number, whatever it is. Later, we can setup Looper to have a permanent, or static, IP number if so desired.
To get the IP number Looper is using simply rotate the knob on the front of Looper for a few clicks. For each click, Looper will rotate through a few status message but the one we’re looking for is showing the assigned IP number. Just keep rotating until the IP number is shown. But keep in mind, if there is some kind of network problem, Looper may show the IP number as None.

Looper’s IP Number
Verifying Network Connection
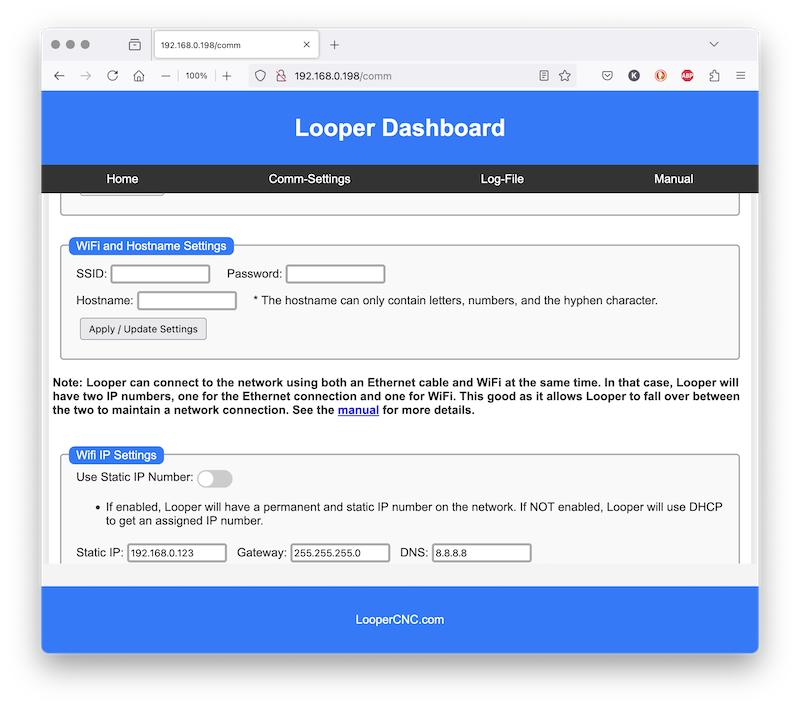
With the IP known, we can now bring up Looper’s web page that allows us to configure all rest of the settings. Note, in the following image, how the IP number was typed right into the browser. With the web interface working, all the other settings can be adjusted using a simple to use set of web pages.

Looper Default Web Page
Networking Setup
With Looper’s web page up, click on the ‘Settings’ menu option. Scroll down a bit until ‘Hostname’ is visible. Set the hostname to something that works for you. Maybe something like ‘OLD-VF5’ or ‘FADEL-NO1’.
Note
The hostname can only contain letters, numbers, and the hyphen character. Also, upper and lower case letters are ignored - all letters will appear on the network as uppercase. This is just an old network requirement.
Tip
Pro tip, use a label maker and make a hostname label. Put the label on the backside of Looper. This can really help to keep multiple
If using WiFi we need to setup those settings next. If NOT using WiFi, and you only plan to use Ethernet, you can skip to the next step.
WiFi Settings
Tip
Pressing, and holding, the knob to shutdown Looper is just good practice. Otherwise, there is always the risk of the solid-state Ram disk getting corrupted.
Mapping Network Drive on Windows 11
This is also a good time to map a network drive on your PC. This makes it really easy to transfer files directly to Looper. You only need to do this setup once on your PC.
Open ‘File Explorer’ and then click the three little dots as highlighted in the red box in the following image. In the popup option box, select ‘Map Network Drive’, as highlighted with the red arrow.
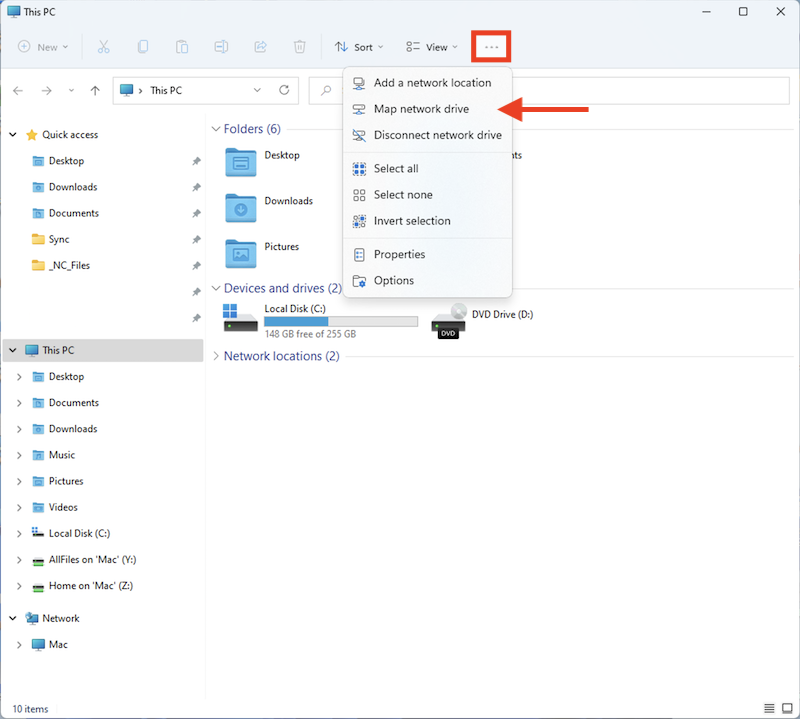
Mapping Network Drive on Windows 11
- The following dialog box should be setup as:
Drive = Your Choice - Single Letter
Folder = ‘\\looper001.local\homes’
Reconnect as Sign-In = Checked
Connect Using Different Credentials = Checked
Click the ‘Finished’ button with these settings.
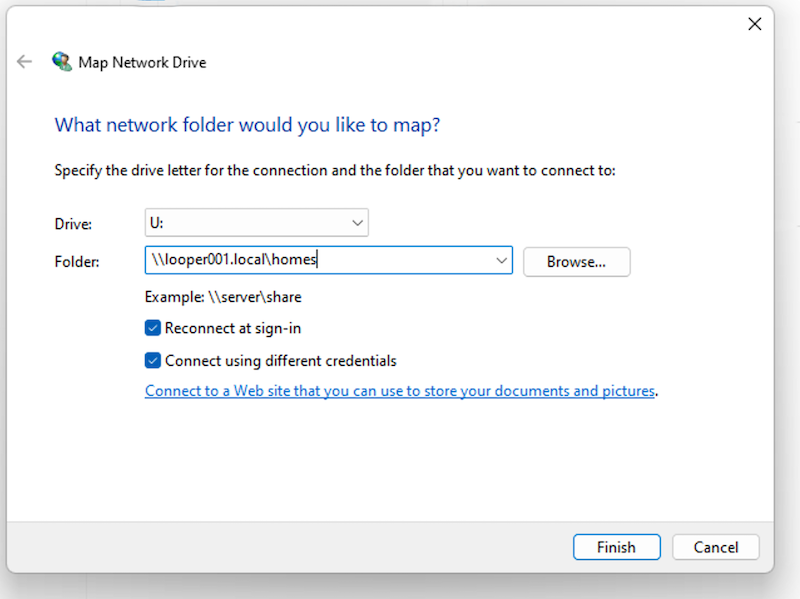
Map Network Drive Settings
Complete the mapping with the username and password.
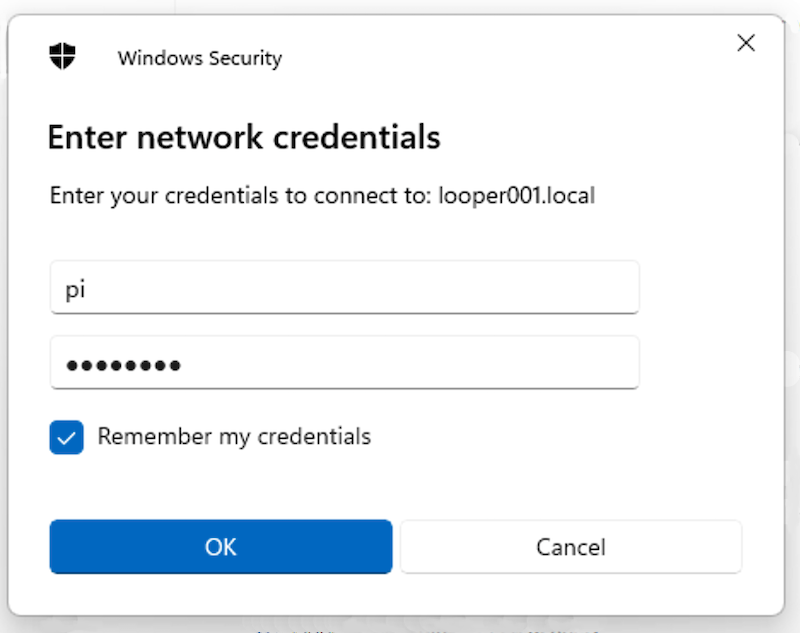
Username and Password
RS-232 Serial Comm Settings
The next step is to configure the serial communications between Looper and your CNC machine. As an example, the following image shows typical settings for a HAAS milling machine. This screen can be found by pressing the “settings” button on the HAAS. Then, press “11” and the down arrow button. This will jump you right to the correct page.
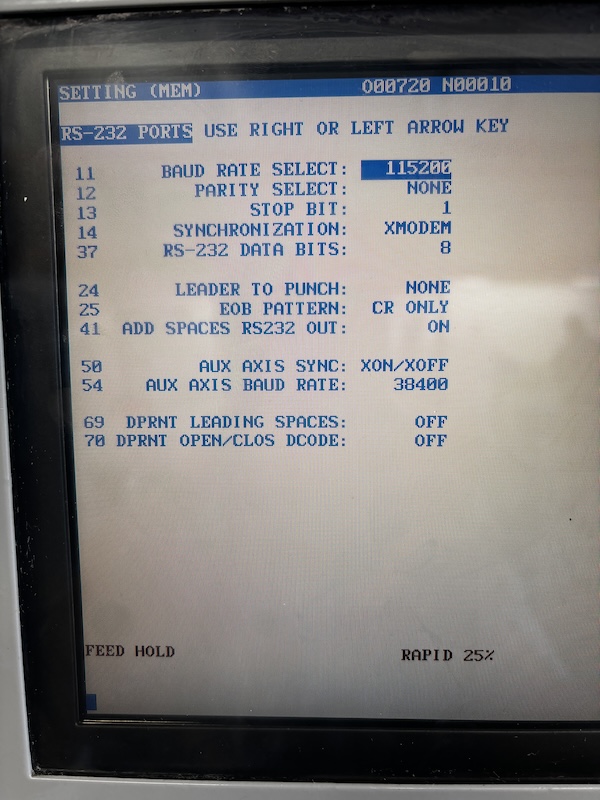
HAAS RS-232 Default Settings
The first five settings at the top of the page control the HAAS serial port that connects to Looper. In this example, the HAAS settings are:
Baud Rate Select = 115200
Parity Select = None
Stop Bit = 1
Synchronization = Xmodem
RS-232 Data Bits = 8
Make sure to change the HAAS settings on this page to match those shown on this page. They must match!
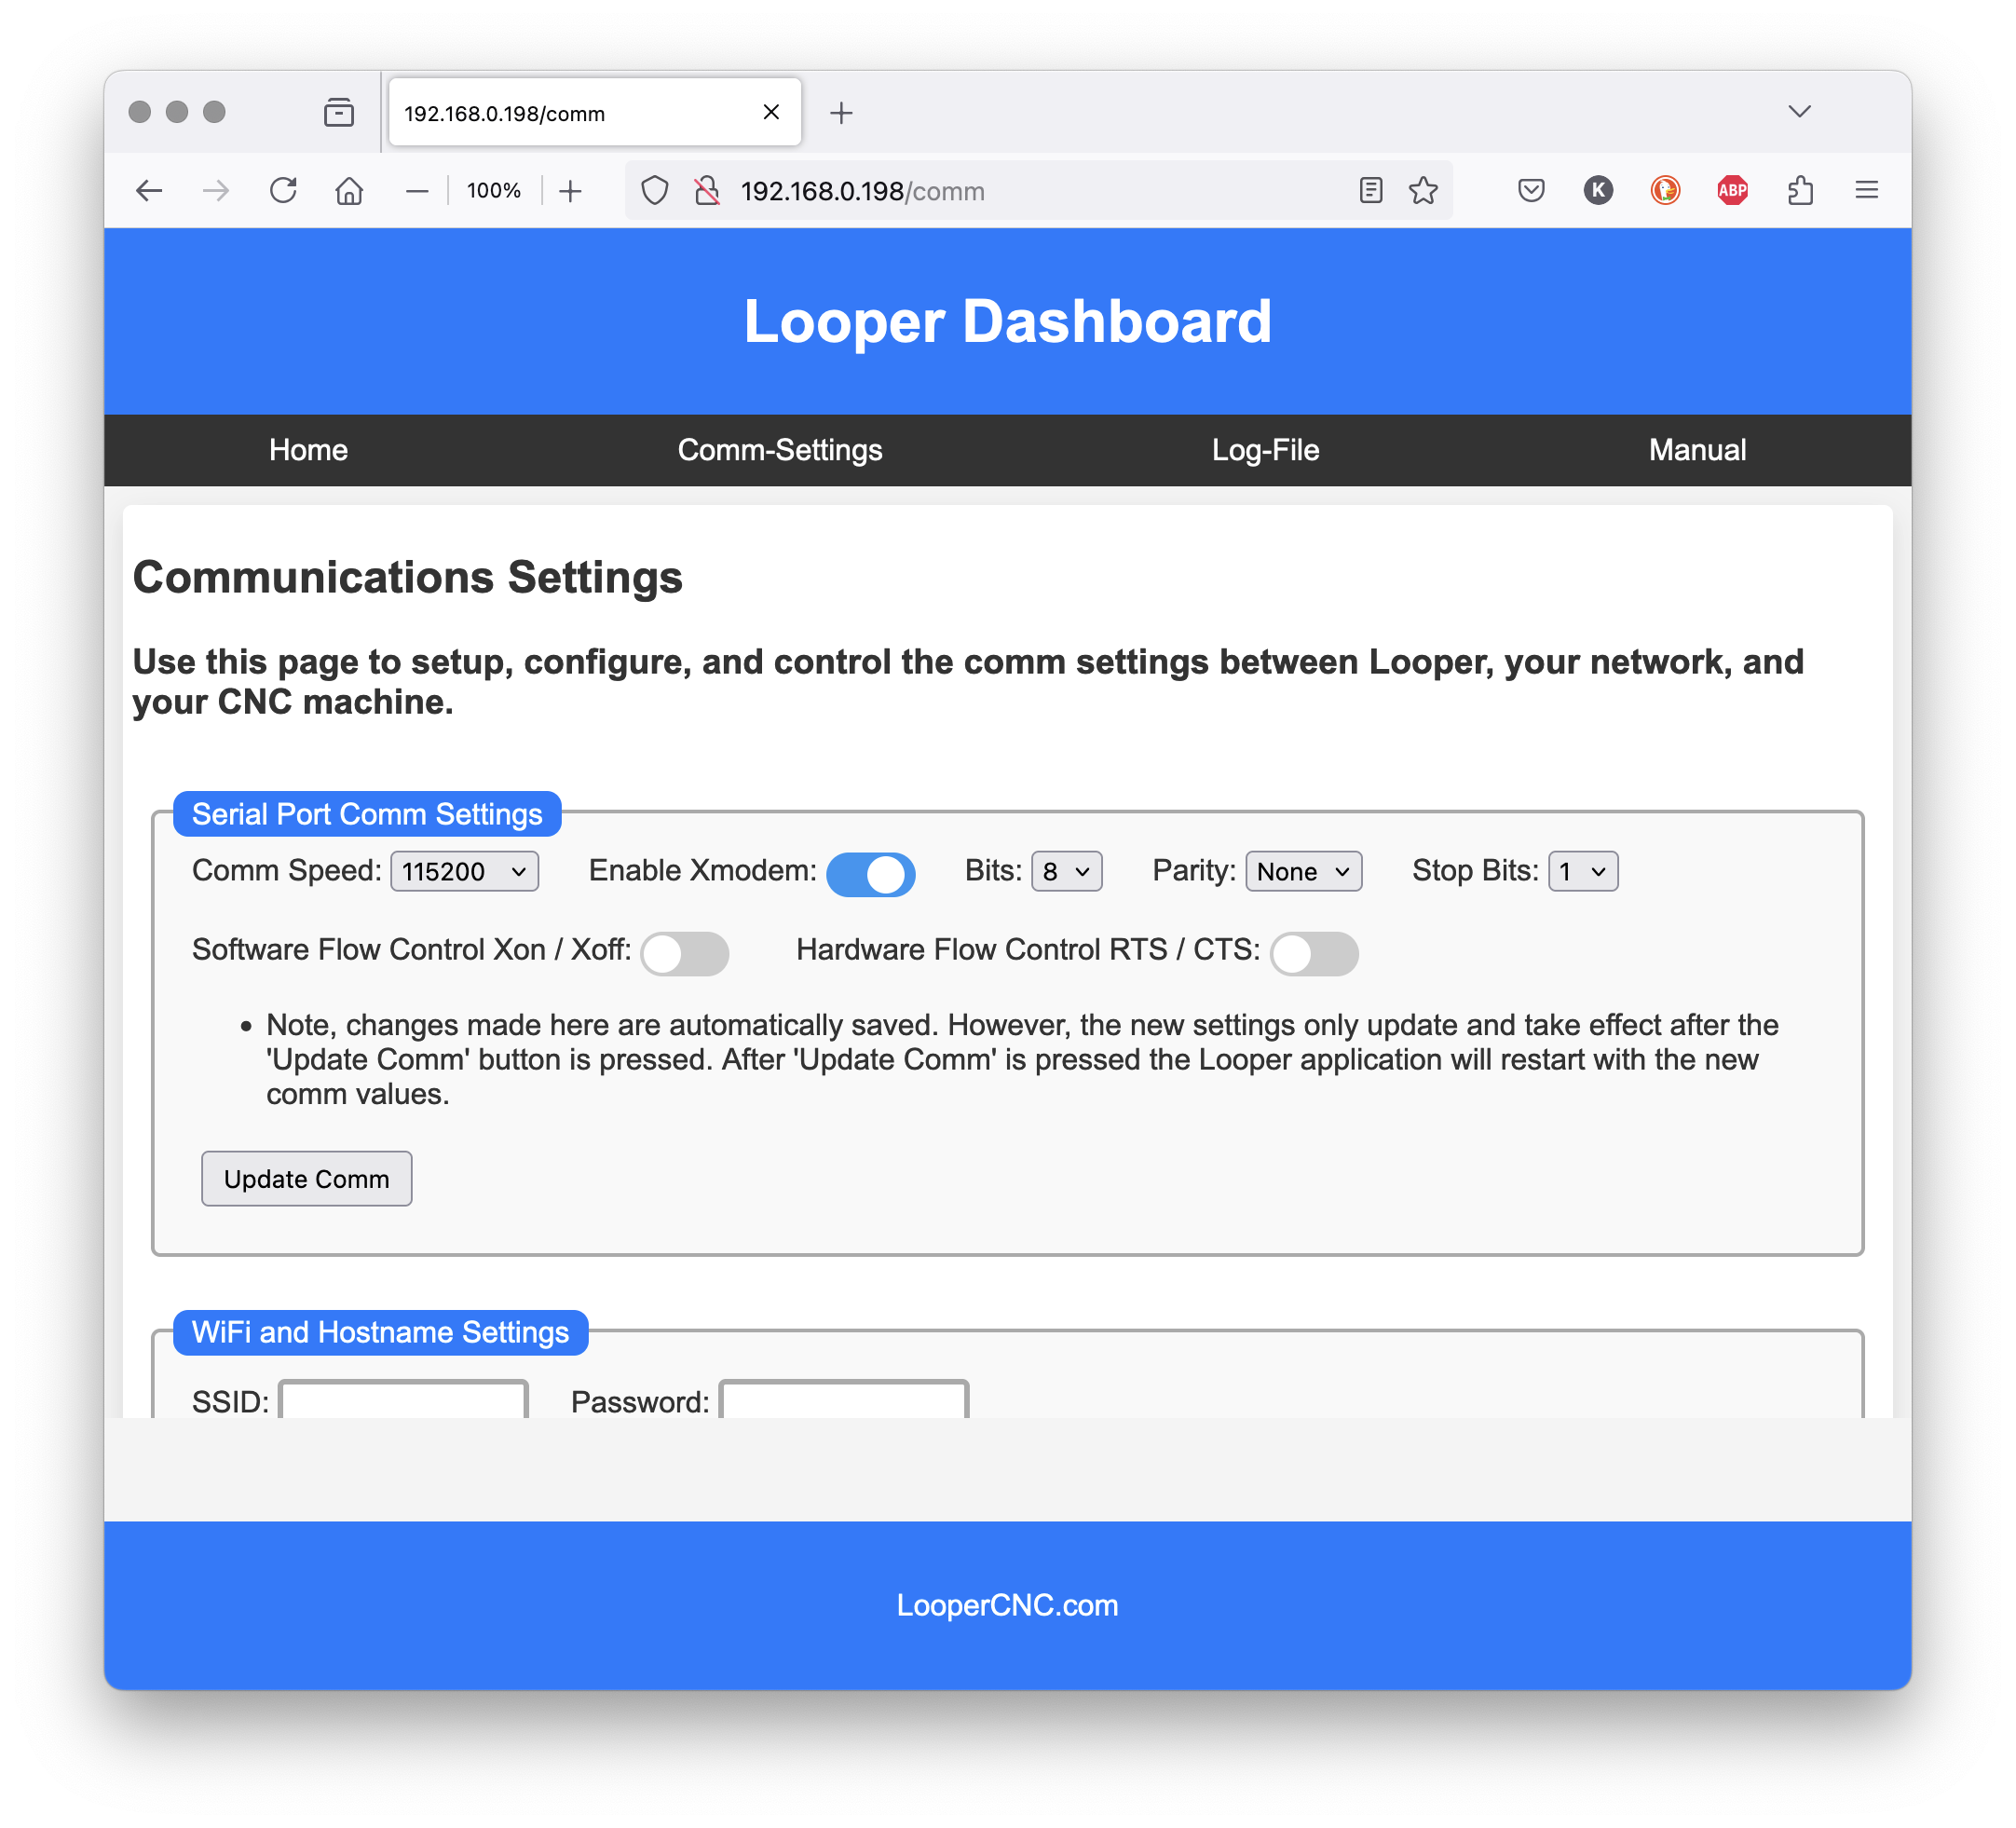
Comm Settings
Note
In this example, because ‘Xmodem’ is enabled, the settings for ‘Xon/Xoff’ and ‘RTS/CTS’ get ignored. The Xmodem protocol handles flow-control internally.
Tip
Xmodem is a really good choice when using a HAAS. The Xmodem protocol detects and corrects communications errors automatically while downloading.
If you are using a device that is not a HAAS, we recommend checking out our Machine Hub. On our Machine Hub we have the suggested Comm Settings for many of the popular CNC machines that are in the market today. However, it is important to configure the Looper Comm settings to best match your personal machine, so use the Machine Hub with a grain of salt.
Note
The remaining steps and checks should be done out on your CNC machine. Therefore, to power-down Looper, press and hold the rotary selector knob. Keep holding the knob even when Looper displays, “Looper is Restarting…”. By pressing longer (10 seconds) your telling Looper you want to shutdown and halt all software on Looper. Looper will respond with, “Looper is shutting down.”. A count-down will then display to let you know it’s OK to cut power.
Serial Cable Connections
Last step is to connect the serial cable between your CNC machine and Looper. The serial cable is made up of two parts. First, there is the supplied USB-to-RS232 dongle. This plugs into any open USB port on the back of Looper. Then, plug the serial extension cable onto the end of the USB-to-RS232 dongle.
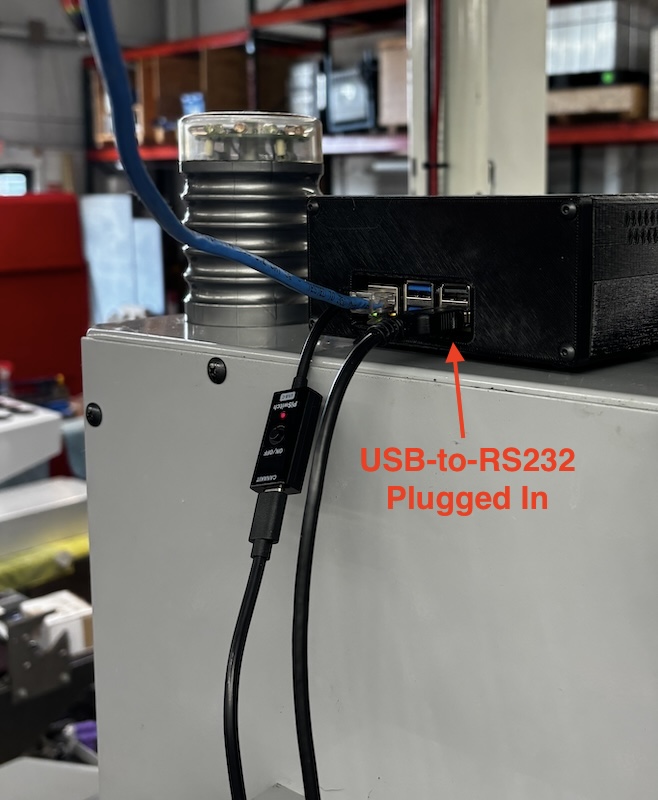
USB-to-RS232 Connection to Looper
Use any USB port to connect the USB-to-RS232 dongle.
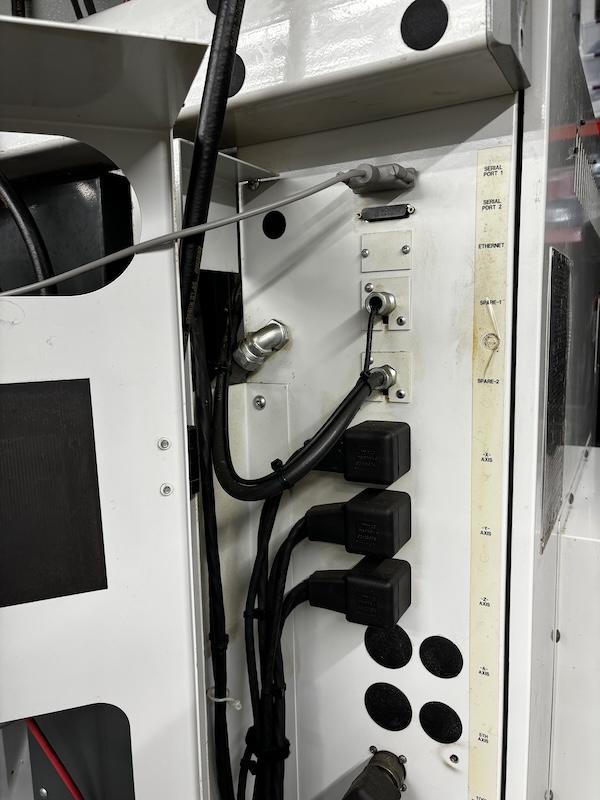
HAAS RS232 Control Panel Connection
Connect the serial extension cable to ‘Port 1’ on the HAAS. This is the top port on the HAAS control panel.
Tip
It’s recommend to use the thumb screws on the RS232 extension cable to secure the cable from becoming unplugged over time.
Warning
While it is possible to throw all the cables onto the roof of your machine, it’s not recommended. Someday I be better and clean this up!
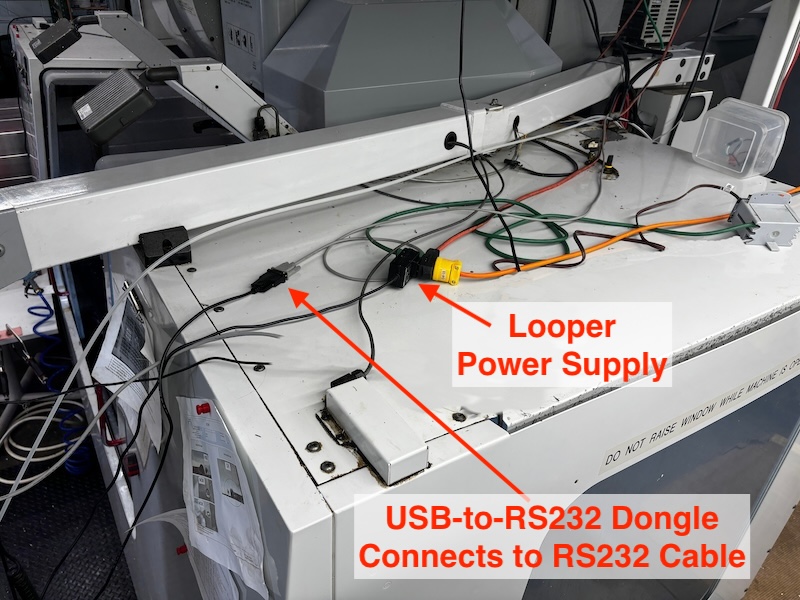
Cables on HAAS Roof